
Datacap’s EMVUSClient™ Test application is intended for development and troubleshooting purposes only. It is not designed to be used by merchants or for processing live payments outside of a POS application and must not be used for this purpose.
Scroll down to view this guide or select a topic from the Table of Contents below.
Download the latest version of the EMVUSClient™ Test application on datacapepay.com under the Diagnostics/Utilities section.
Run the downloaded executable file to install EMVUSClient™ Test application for EMV transaction diagnostics. Restart computer when installation is complete.
Make sure the Datacap Tran™ device is plugged into the computer where the EMVUSClient Test application is installed. You will also need a EMV-enabled PIN Pad programmed to your specific processor connected to the Tran device.
Required Fields include:
Com Port
Note: You do not need a Merchant ID or Terminal ID.
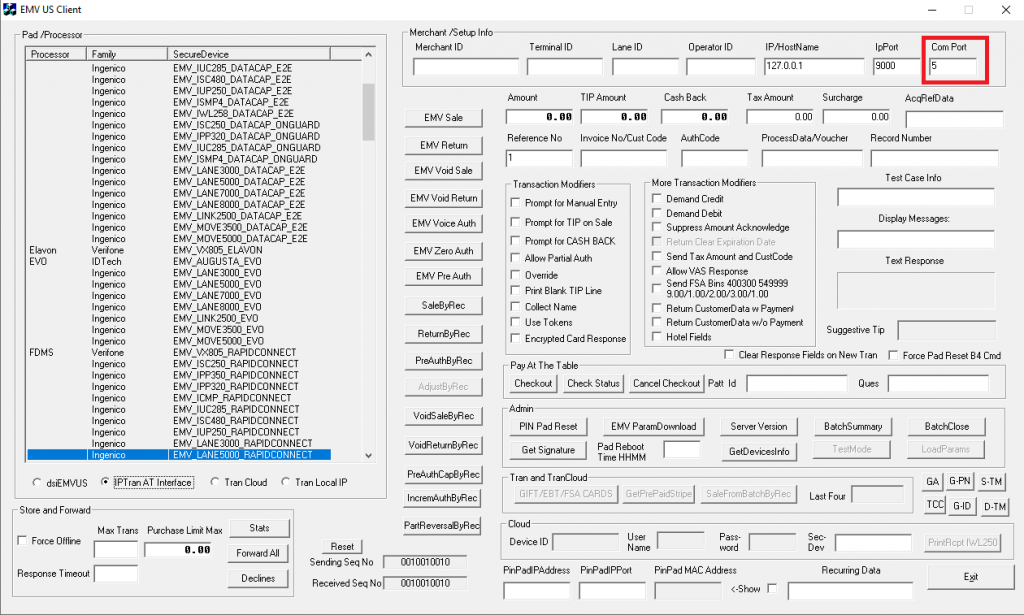
Select “IPTranAT Interface” from the Pad/Processor list on the left side of the application window.

In the ‘Com Port’ field on the top right of the application, type in the com port number of the USB converter or serial port that the IPTran LT or PDC is plugged into on your computer.
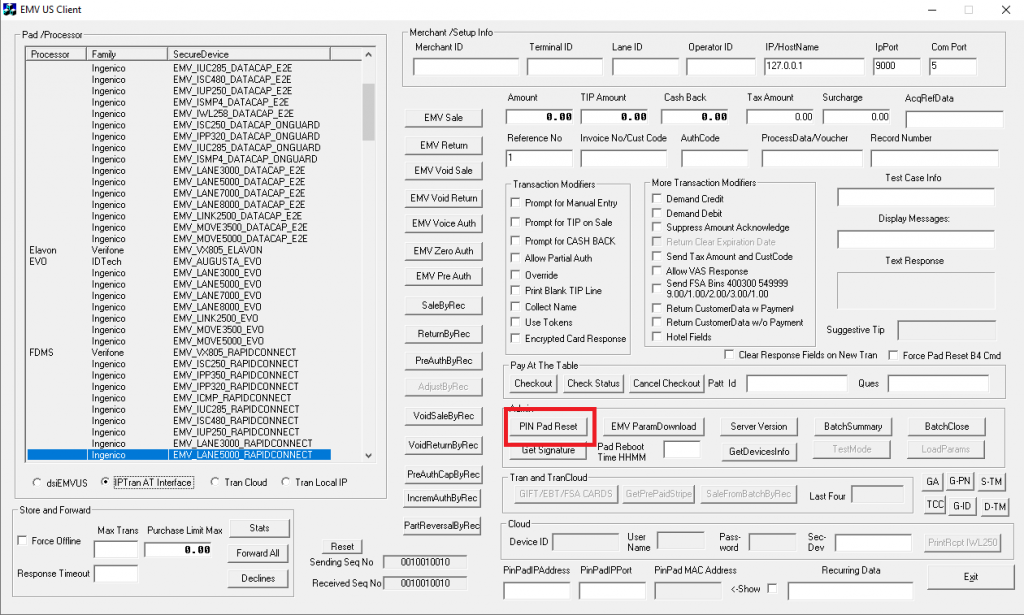
Perform a “PIN Pad Reset” to confirm connection with the EMV-enabled PIN Pad, and reset it to “idle” state.
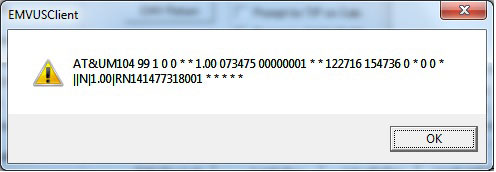
Any command sent from the test application to our Tran interface will show you the AT command being sent to the Tran Unit.

EMVUSClient™ Test application sends a request for receipt data to Tran after every request whether receipt data is available or not. If receipt data is returned it will be displayed; If not, Tran will return an error.
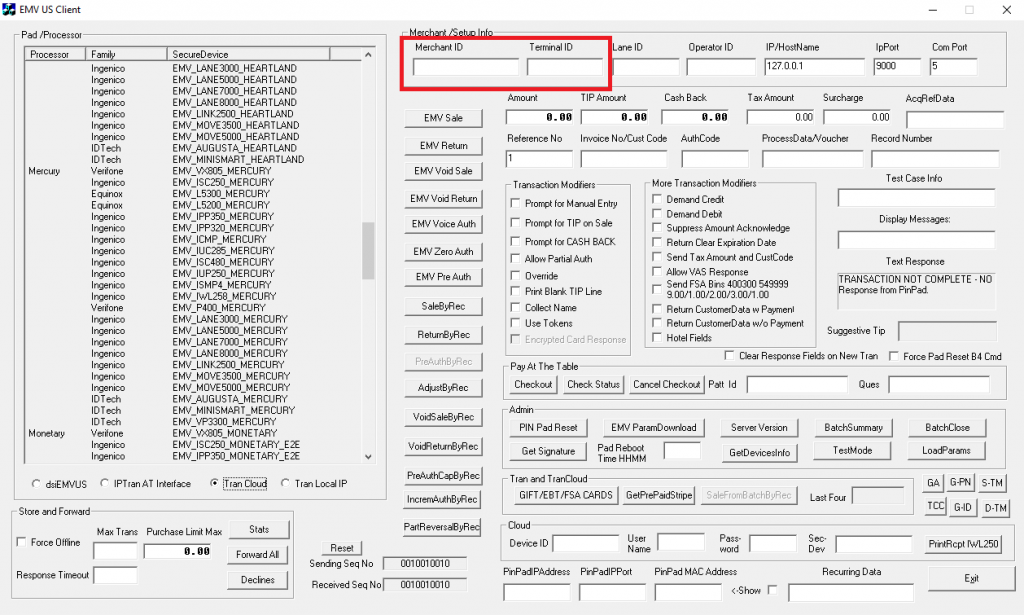
Required Fields:
Merchant ID is required
Terminal ID is required by the following processors: Chase, Vantiv, Worldpay US, and First Data Rapid Connect
IP/Hostname is the IP address of the computer you are currently running NETePay on
IpPort is the default number of 9000
*Merchant ID might not be called Merchant ID depending on what processor you are using, but will always be the first parameter on your processor provided parameter sheet(e.g. TSYS calls their Merchant ID the “Host Capture POS ID”).*
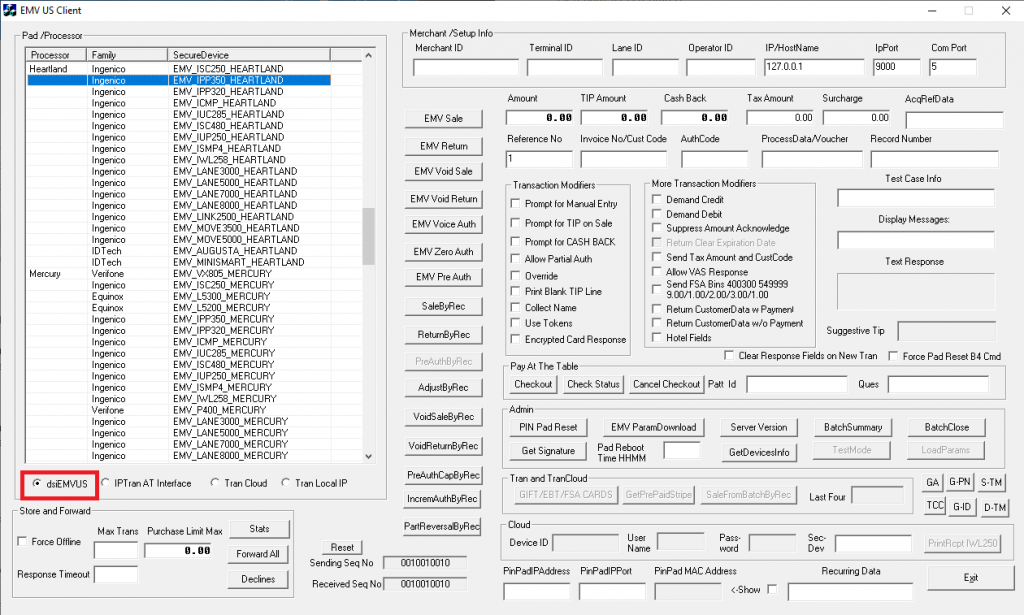
Select the radio button for “dsiEMVUS” at the bottom left of the application, and then hi-light the Pad/Processor combo that you are using.
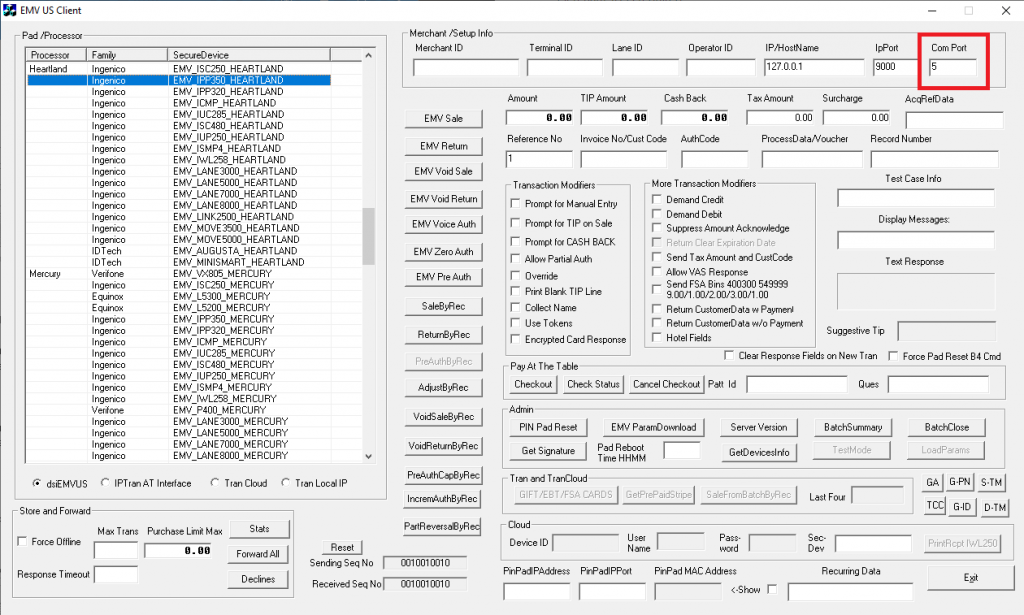
Match Com ports for the EMV-enabled PIN Pad using Windows Device Manager (access from Control Panel > Device Manager).
Perform a “PIN Pad Reset” to confirm connection with the connected EMV-enabled PIN Pad, and reset it to “idle” state.

Any command sent from the test application to our dsiEMVUS interface will first show you the XML request being sent out to our client control, dsiEMVUS.

If receipt data is not returned, it is not displayed. You should receive no additional dialog.
Required Fields:
Merchant ID is required
Terminal ID is required by the following processors: Chase, Vantiv, Worldpay US, and First Data Rapid Connect
*Merchant ID might not be called Merchant ID depending on what processor you are using, but will always be the first parameter on your processor provided parameter sheet (e.g. TSYS calls their Merchant ID the “Host Capture POS ID”).*
Select “TranCloud” from the Pad/Processor list on the left side of the application window.
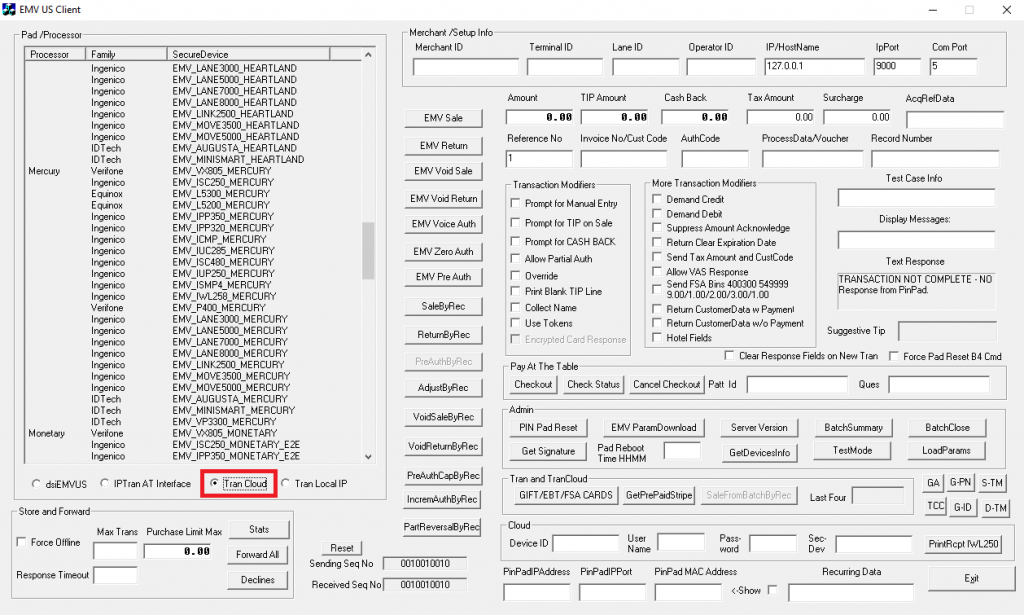
Enter the Merchant ID (provided by processor) and the Terminal ID (if applicable, this will depend on Processor).
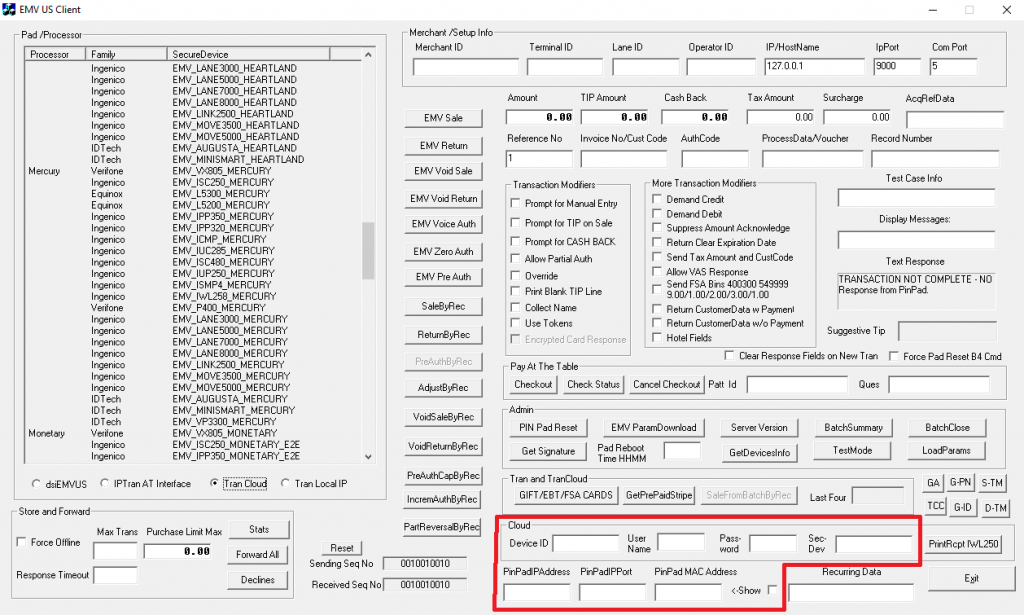
Enter the following fields in the “Cloud” section:
Device ID: TranCloud Device ID located on the back of the TranCloud device
UserName: TranCloud Account ID
Password: Test TranCloud Auth code
Sec-Dev: Enter the Secure Device ID sent in the request (NOTE: This value is entered only if the ISV plans to support installs with a mix of devices, otherwise it should be left blank. When entering a value here TranCloud must have its Pin Pad type set to “SecureDevice Provided by POS”)
PinPadIPAddress: If communicating to PIN pad over IP, enter the static or DHCP-reserved IP address.
PinPadIPPort: 12000 (if not using default IP Port, enter the alternate value)
PinPadMACAddress: If communicating to PIN pad over IP by MAC Address, enter MAC Address value (NOTE: Enter only the PinPadIPAddress or the PinPadMACAddress)
Set the TranCloud device to Test Mode by selecting “TestMode”.

Perform a PIN Pad Reset
Perform an “EMVParamDownload”.

In this case, we have an IPTran LT connected to com port 3. Press the “EMVParamDownload” button. The duration of an EMV Parameter varies per processor (generally takes between 1-3 minutes). Once the EMV Parameter Download is complete, click “Ok”.
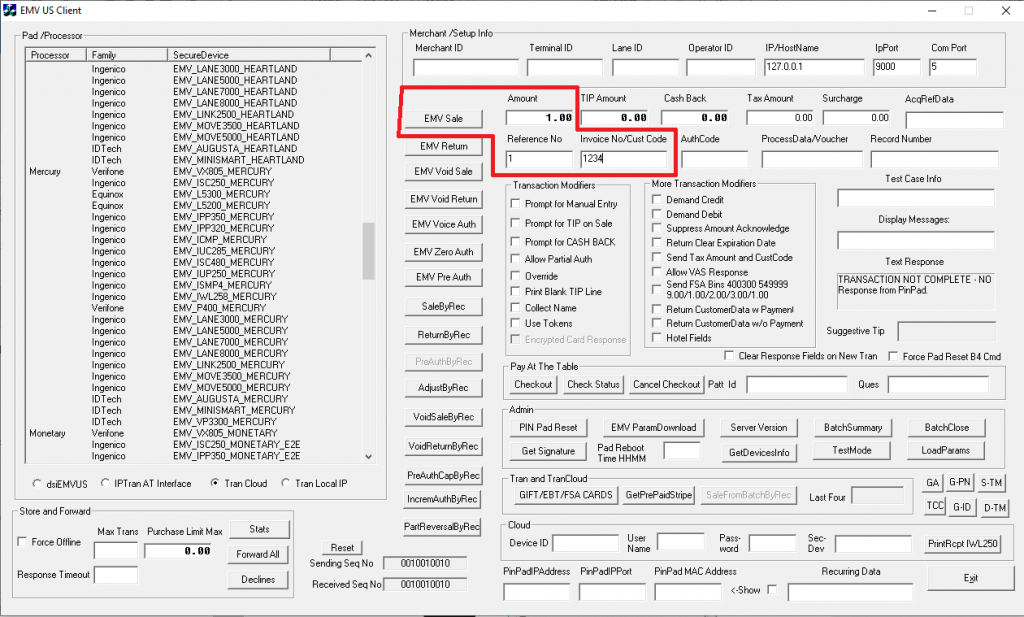
Once the EMVClientTest application is set up, you will want to run a test sale to help diagnose your EMV issue. To run a test sale (or any test transaction), the following fields are required:
Amount – put in a small dollar amount in the “Amount” field (i.e. $1.00)
Reference Number – This number is automatically generated
Invoice Number – The reference number and invoice number of a Test Sale should be the same value
**Some Processors require certain transaction modifiers to be selected in order to run test transactions. See below for TSYS and Vantiv IP (Mercury)**


Click the “EMV Sale” button to initialize a test transaction.
An “EMV Sale” will return an XML stream (NETePay) or a string of AT commands (Tran).

Click “OK” to continue to the next prompt.
You may encounter error messages while working with the EMVUSClient Test application. Click the links below to read about common error messages associated with the test application.
Call us (215-997-8989) or Send us a message