Setting correct date and times on payment devices is important for batching, daily reports, receipts and chargeback disputes. Date and time settings on supported payment devices are set as part of the EMV parameter download from the POS. In some instances, you may have to set the date and time manually if the EMV Parameter download does not set it appropriately. See instructions below for how to set the date and time by PIN pad manufactuer:
PAX Android
1 Swipe up from the bottom of the screen.

2 Touch the back key ◁ twice.
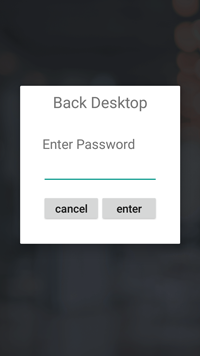
3 When prompted for Back Desktop password type "pax9876@@". Touch "Enter".
Note: “123456” may work on some devices as passwords may vary. For EVO Snap devices, use “EVO72963687” for the password.

4 From the Android Desktop, touch "Settings".

5 When prompted for password, type"pax9876@@". Touch "OK".
Note: “123456” may work on some devices as passwords may vary. For EVO Snap devices, use “EVO72963687” for the password.

6 Select System > Date & Time > Set to "Automatic date & time" and "Automatic time zone" or manually set date and time. PAX Android also has an option for 24-hour format.


Ingenico TETRA devices (Lane/Link/Move Series)
1 From the Welcome Screen, press 2-6-3-4 followed by the Silver Key (F Key).

2 Select "TETRA Admin".

3 Select "Set Date & Time".

4 Set Date using the mm/dd/yyyy format.


5 Set Time using military or 24 hour format (HH:MM).


DC Direct Ingenico
1 From the Welcome Screen, press 2-6-3-4 followed by the Silver Key (F Key).

2 Select Admin Mode, type password 123456A (A must be capitalized).

3 Select Tetra Admin > Set Date & Time


4 Set Date using the mm/dd/yyyy format.


5 Set Time using military or 24 hour format (HH:MM).


Verifone P400 or P200
1 Press 1+5+9 simultaneously to enter the settings menu.
2 Select "Control Panel".

3 Select "Sysmode".

4 Select "Supervisor".

5 Enter password. Passwords may vary by distributor:
- 1111111 (First Data)
- 1166832 (production)
- 1668321 (dev)
- 1686321 (other)
6 Select "Administration".

7 Select "Date/Time".

