
Table of Contents
About DC Direct standalone
DC Direct is a payments solution that embeds payments logic into payment devices to facilitate a direct communication between the device and Datacap’s NETePay Hosted payments platform. DC Direct can be deployed in standalone (out-of-the-box processing) or semi-integrated mode. Switch between modes on demand.
DC Direct standalone supported devices
Standalone mode is supported on the following device models. These models support both standalone and semi-integrated configurations:
🛈 Check compatible devices for a full list of DC Direct supported payment devices (standalone and semi-integrated).
Login to DC Direct standalone
1 DC Direct standalone should be open in the foreground. If it's not, open the DC Direct app from the Android Desktop.

2 The default username is "dcdirect". The "dcdirect" password can be changed in PSCS. Unless otherwise specified, proceed without a password.

Credit / Debit Sale
1 Tap the amount section and add the sale amount via the keyboard. Press the "Submit" button.
Note: Tapping the sale button exposes other transaction types (Pre-Auth, Return, Zero-Auth). When choosing one of these other tran types, the void/adjust options will change based on original transaction type selected.

2 Insert, tap or swipe the customer's card.
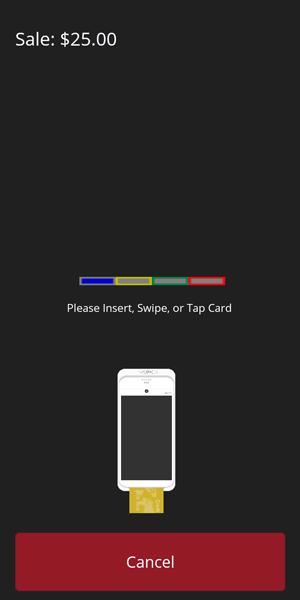
3 Select Customer Receipt or Merchant Receipt to print additional receipt copies. Press "Continue" to return to the payment screen.

Manual Entry Credit / Debit Sale
1 Tap the amount section and add the sale amount via the keyboard. Check the "Manual Entry" check box. Press the "Submit" button.

2 Tap the "Card Number" box to enter the card number. Tap the "Expiration Date" box to add the expiration date. Press "Enter".
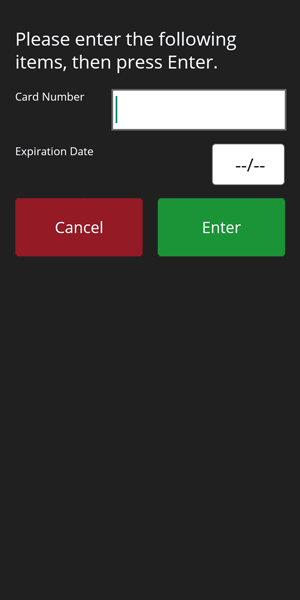
3 Press "Continue" to return to the payment screen.
Debit or Credit Sale Only
1 Tap the "Credit/Debit" button next to the amount section and choose from one of the dropdown options. Add the sale amount via the keyboard. Press the "Submit" button.


2 Insert, tap or swipe the customer's card.

3 Select Customer Receipt or Merchant Receipt to print additional receipt copies. Press "Continue" to return to the payment screen.
Void or Adjust Transactions
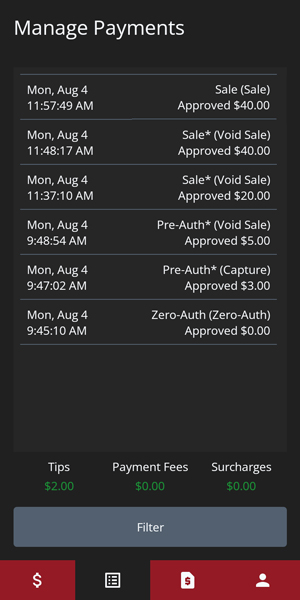
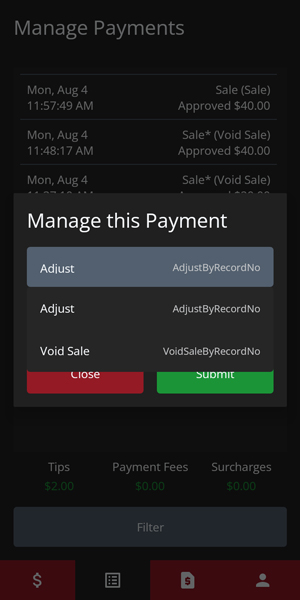
1 Tap the "Manage Payments" section. Select the transaction to void or adjust and press the edit button.
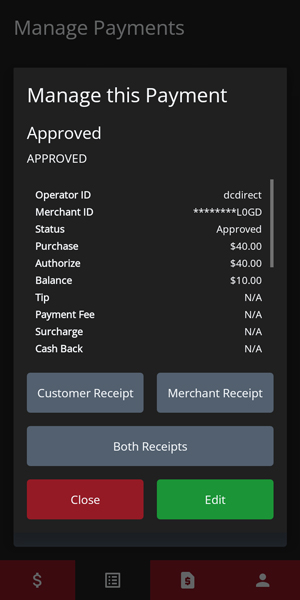
2 Tap on the "Adjust" button to expose the dropdown menu and select "Void Sale". To adjust the transaction, leave the "Adjust" option selected and update the new gratuity amount.
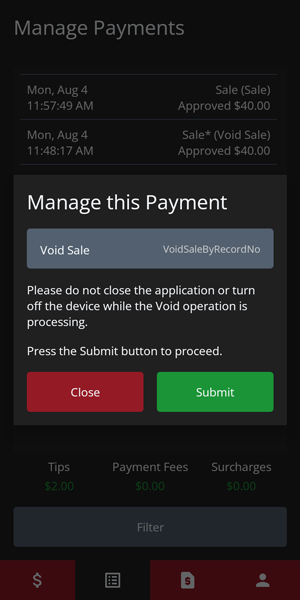
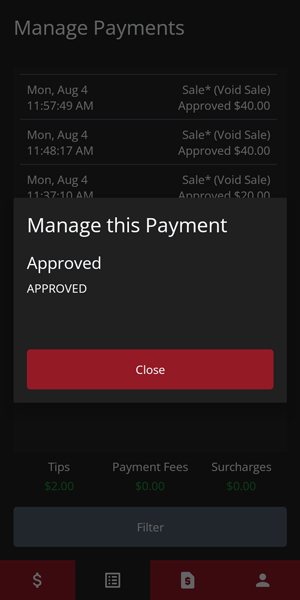
3 Press "Submit" to void the transaction. Once the void is approved, press "Close" to return to the "Manage Payments" menu.
Return
1 Tap the "Sale" button and choose "Return" from one of the dropdown options. Add the return amount via the keyboard. Press the "Submit" button.


2 Insert, tap or swipe the customer's card.
3 Press "Continue" to return to the payment screen.
Surcharge and Payment Fee
In order to add support for a compliant surcharge or a custom payment fee, you need to modify the standalone settings in the PSCS file associated with your DC Direct deployment (s).
1 Login to your PSCS account. From the main menu, chose "Change Activated Stage File" and modify the settings below. Click "Save Activated Stage File".

2 On your DC Direct device, press the "Get Parameters" button.

Settle Batch
1 Tap the report icon next to the user icon to open the batch report. Press the "Close Batch" button.

2 Enter the admin username and password. The batch report will print.

Create New Users
1 Log in to DC Direct standalone. The default username is "dcdirect". The "dcdirect" password can be changed in PSCS. Unless otherwise specified, proceed without a password.
2 Tap the user profile icon in the bottom right. Press the "Create New User" button. Add a username and optional password. Confirm the password and press submit.


Note: To manage/change the default “dcdirect” password, log into PSCS and change the password via the merchant deployment.
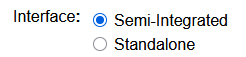
Switch to Semi-Integrated Mode
DC Direct can be deployed in standalone or semi-integrated mode and switched between them at any time.
1 Login to your PSCS account. From the main menu, chose "Change Activated Stage File" and modify the settings below for the applicable deployments. Click "Save Activated Stage File".
2 On your DC Direct device, press the "Get Parameters" button from the user screen. The device will reboot and load in semi-integrated mode.
Reboot or Power off PIN Pad
1 Press and hold the power button on the side of the PIN Pad. The following options will appear:

2 Press "Restart" or "Power off".