DC Direct Set-up / Desk/3500 Modes / Semi-Integrated Options / Ingenico Desk/3500 Semi-Integrated Wi-Fi
What do you need to connect DC Direct using the Desk/3500?

1 On first boot a prompt should be displayed with the message “Set up Wi-Fi?”. Press the “Enter (Green)” key to be taken to the “Configure Wi-Fi” section of Tetra Admin. If the “Set up Wi-Fi?” prompt was not displayed, the “Cancel (Red)” key was pressed, or one of the menus timed out due to inactivity.
1A From the idle screen press the “F” key (silver circle key).

1B Select “Admin Mode”.
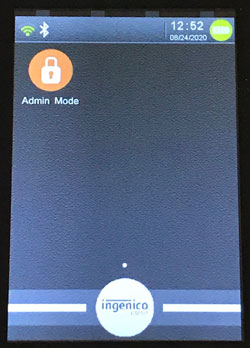
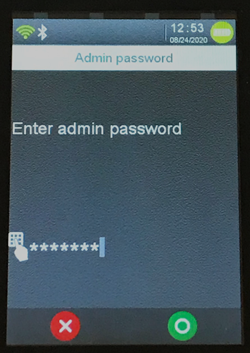
1C Enter the admin password (123456A).
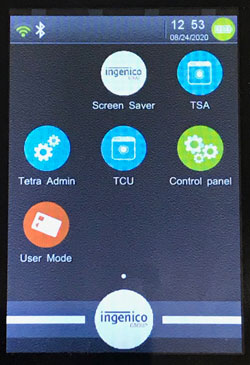
1D Select “Tetra Admin”.
1E Select 3-Configure Wi-Fi.
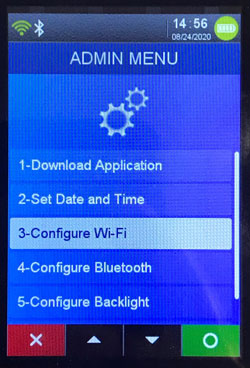
2 Select 1-Scan Networks.
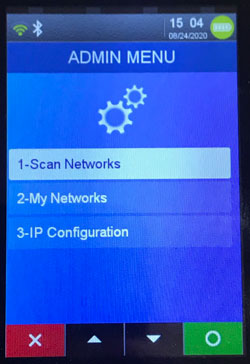
3 Once scanning is complete select your WiFi network’s SSID. If your WiFi network is hidden or it’s SSID is not displayed select “Other” to enter it manually.
4 Type in your WiFi network’s password then press the “Enter (Green)” key. You’ll be returned to Tetra Admin. If the device was able to connect to the network the WiFi symbol in the upper left corner of the screen should now be green.
1 From the idle screen press the “F” key (silver circle key). If prompted for amount press the “F” key a second time.

2 Select “Admin Mode” if given the option.
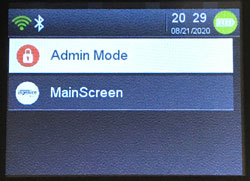
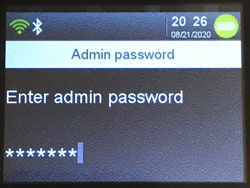
3 If prompted for the admin password type “123456A” then press the “Enter (Green)” key.
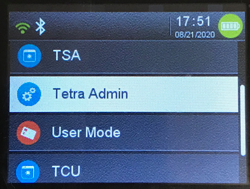
4 Select “Tetra Admin”.
5 Select 1-Download Application
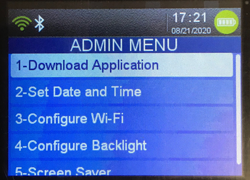
6 Select 1-Configure Download
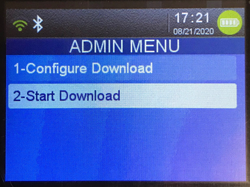
7 Select "Network Type"

8 Select "WiFi"

9 Press the Green Enter key.
10 Press the Red Cancel key.
11 Select 2-Start Download

12 Press the Green Enter key when prompted to “Enter package name”. No value is needed.
The device will reboot twice then settle on the idle screen.
1 From the idle screen press the “F” key (silver circle key) .

2 Select “Admin Mode”.

3 If prompted enter the admin password (“123456A” by default) then press the “Enter (Green)” key.

4 Select “Tetra Admin”.

5 Select “Set Date and Time”.
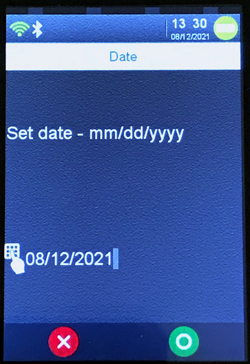
6 Select “Set Date”.

7 Enter date in mm/dd/yyyy format and press “Enter (Green)” key.
8 Select “Set Time”.
9 Enter time in hh:mm format and press “Enter (Green)” key.

10 Press the “Enter (Green)” key.
11 Press “Cancel (Red)” key twice to return to idle screen.
Pair DC Direct with your POS using the device id or the device IP address.
Identify the Device ID (SN number) located on the back of the device. Use this value to pair your Point of Sale with DC Direct.
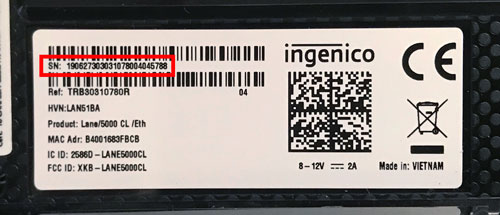
Note: to find the SN number, you may have to remove the cover on the back of the PIN pad.
1 At the "Welcome" screen press the .,#* button.
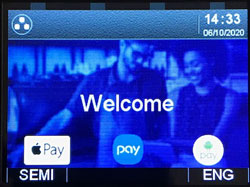
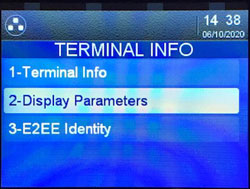
2 Select 7-Terminal Info

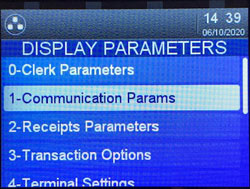
3 Select 2-Display Parameters
4 Select 1-Communication Params
5 Scroll to "TerminalIP"at the bottom of the screen. This is the device's current IP address on the network.
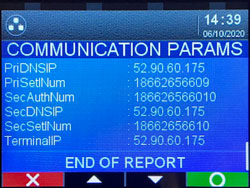
Use the “TerminalIP” (IP address) identified above to pair your Point of Sale with DC Direct.
Verify that all test transactions successfully reached NETePay Hosted™. Login to your dashboard via Datacap’s Reportal to view transactions. Contact your processor to confirm that all transactions were received and the appropriate accounts were funded.


Contact your POS provider for help installing DC Direct.