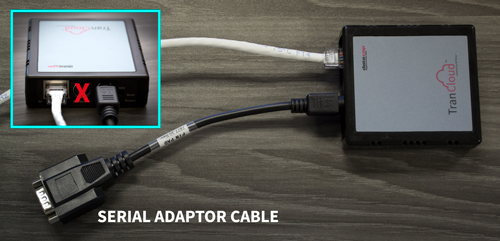


On the VX 805, verification settings differ based on the XPI or software version running on the VX 805.
Click which XPI version below to see how to verify COM settings.
Check what interface is set on the VX805 by pressing the “alpha” and ‘8” keys when the VX805 displays “welcome” on the idle screen.
If it is determined that the VX 805 is set for the wrong interface, you can change it by pressing the “alpha and the 8 key” when the XPI version is displayed during the boot cycle.
Once the screen changes to a new menu, select the correct interface by pressing the corresponding function key.
Press F2 and F4 to enter system mode.
Enter the password (1, ALPHA, ALPHA, 6, 6, 8, 3, 1) and then hit “Enter”.
The Alpha key is the black key located directly above the 2 key. Enter is the Green key.
Press 2 for “Edit Parameters”.
Select “1” for “Group ID” and hit “Enter” followed by the password (1, ALPHA, ALPHA, 6, 6, 8, 3, 1). Press “Enter”.
Select “CONFIG.SYS” then hit “Enter”.
Search for Parameter: “SACOM” = COM1 or USB if connected USB.
If incorrect select “3” to edit. To change values, press the “clear” button (yellow key), and then enter USB or COM1 (to change to “alpha” select number then alpha key until correct letter is displayed) then press “Enter”.
Search for Parameter: “SABAUD” = 9600 or USB if connected USB.
Press “cancel” key (Red button).
Press “1” to restart VX 805.
Press F2 and F4 to enter system mode.
Enter the password (1, 6, 6, 8, 3, 1) and then hit “Enter”.
The Alpha key is the black key located directly above the 2 key. Enter is the Green key.
Press 2 for “Edit Parameters”.
Select “1” for “Group ID” and hit “Enter” followed by the password (1, 6, 6, 8, 3, 1). Press “Enter”.
Select “CONFIG.SYS” then hit “Enter”.
Search for Parameter: “SACOM” = COM1 or USB if connected USB.
If incorrect select “3” to edit. To change values, press the “clear” button (yellow key), and then enter USB or COM1 (to change to “alpha” select number then alpha key until correct letter is displayed) then press “Enter”.
Search for Parameter: “SABAUD” = 9600 or USB if connected USB.
Press “cancel” key (Red button).
Press “1” to restart VX 805.
100 New Britain Blvd.
Chalfont, PA 18914
P: 215-997-8989
E: sales@dcap.com
Hours of operation:
Monday – Friday 8:30AM to 5:30PM EST
Disclaimer: Apple, the Apple logo, and Apple Pay are trademarks of Apple Inc., registered in the U.S. and other countries and regions. The “Android” name, the Android logo, Google Pay and other Google trademarks, are property of Google LLC.